Took the Travel Trailer out for her Maiden Voyage this weekend. We went Thursday - Sunday to a nice private park. Generally we only camp at State Parks but because we had to bring Studs and Lama Ding to weigh ins for Pop Warner so we needed to keep close. We had been there prior when new owners took over in May of 2010 and WOW did they make lots of improvements from then! They have done a GREAT job of making a wonderful kid friendly place.
So here is what we did to make our new to us Travel Trailer livable! LOL! Well, this is what we found when we looked up there (with the vents on it, we had already started de-constructing at this point. Notice the "white roof?" Yea....it's not white at all.
Here is DH pulling the "white" rubber roof off the front of the trailer.
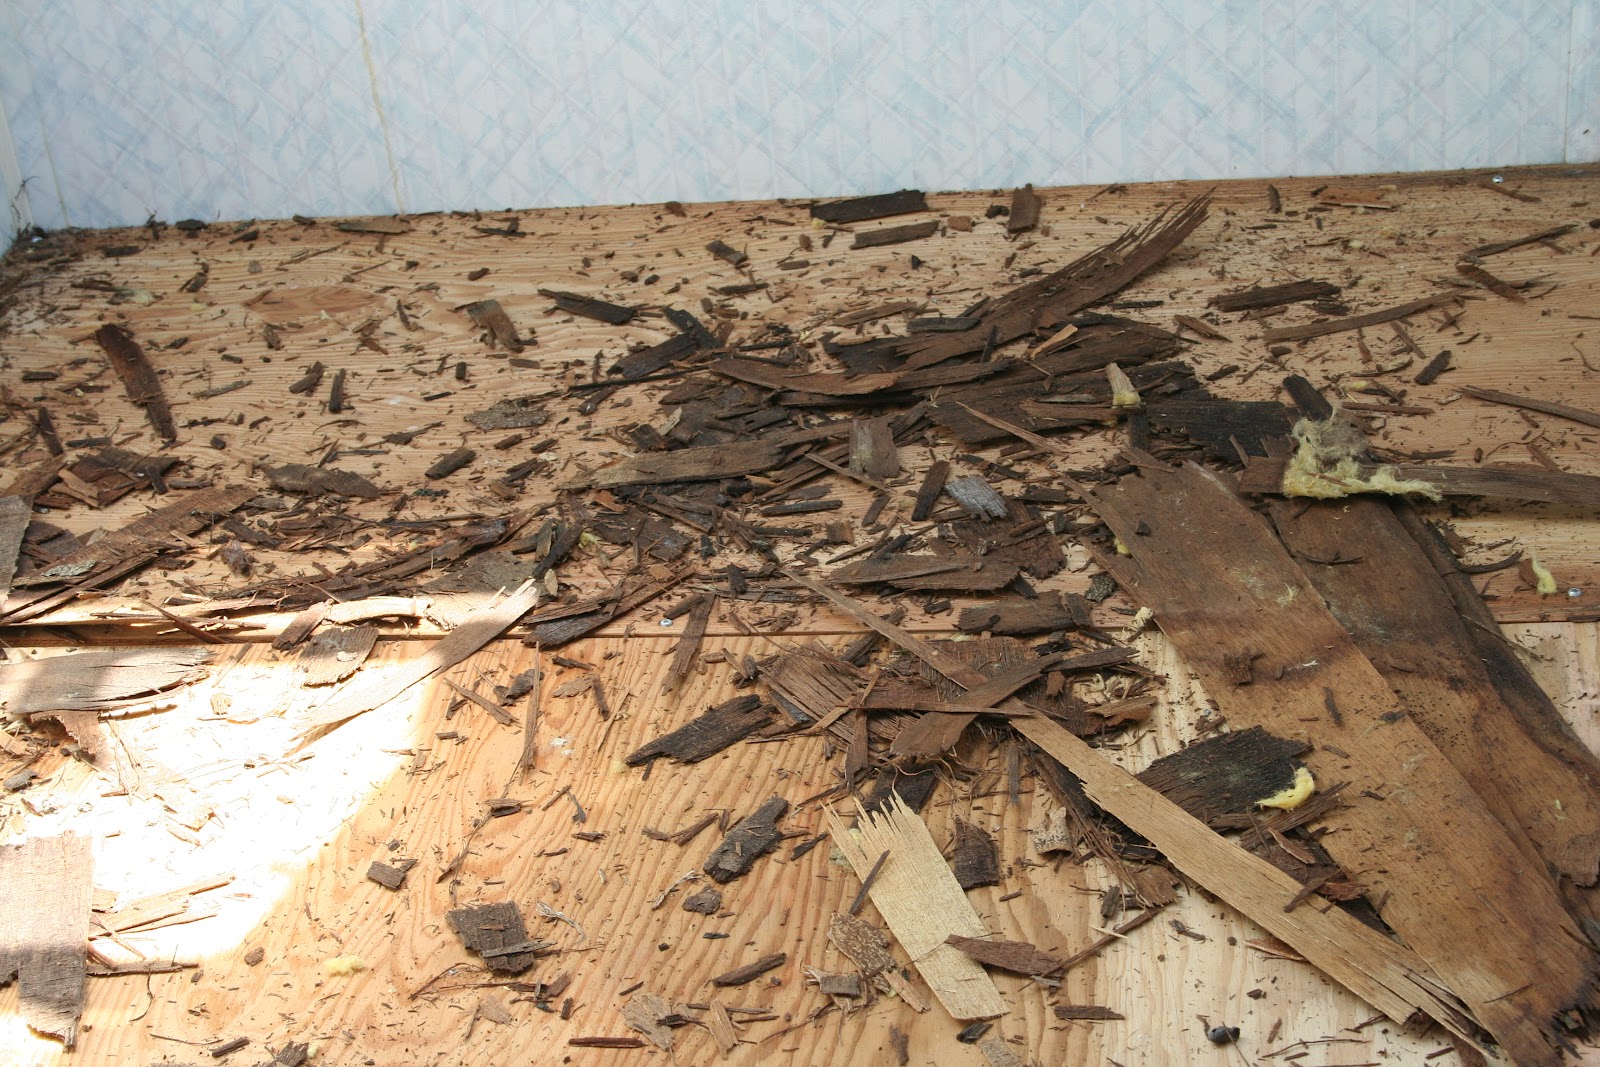
Here is what the back looked like when we opened her up. Can you see all the wet rotten wood. The last picture shows that even the ceiling was wet and soaked and we ended up pulling out the back ceiling too. The luan was just rotted out and crumbled in our hands. OH BOY what did we get ourselves into! Deep breath - OK well, let's figure this out! After finding the wet ceiling here is what we look like with no ceiling =0)
Nice dry warm summer day to help dry out the wood and 2x2's that weren't completely rotted out. Now off to Menard's to get what we THINK we need!
DH doing a little more cleaning out and investigating!
Look Mom, no ceiling!
Yep....little more has to go!
Certainly a messy job!
Whoooo Hooooo! Look at that! A new ceiling!!!!!
YEA!!!! So much prettier!!!!
New insulation in the back and new luan wood starting to go up!
All new and pretty now!!!!
Next day our friend blowing the top off so that there is no dust or anything to roll the new rubber roof!
DH putting down the adhesive for the rubber roof. The black side goes down onto the luan.
Our friend putting adhesive on his side.
Looking Pretty!!!!!!!
Rubber all laid out!!! Now time to replace the vents and bathroom skylight.
Two more vents that have to go back in
Looking like a travel trailer should look like!!!!
Putting the vents back in on the inside!
Adding the side and rear strips to finish off the ends and edges
Lap Seal....Lots and Lots of Lap Seal!!! We aren't going to let what happened to her happen again!
Lap Seal around all the vents and skylight
All the sides and back trimmed up and almost done
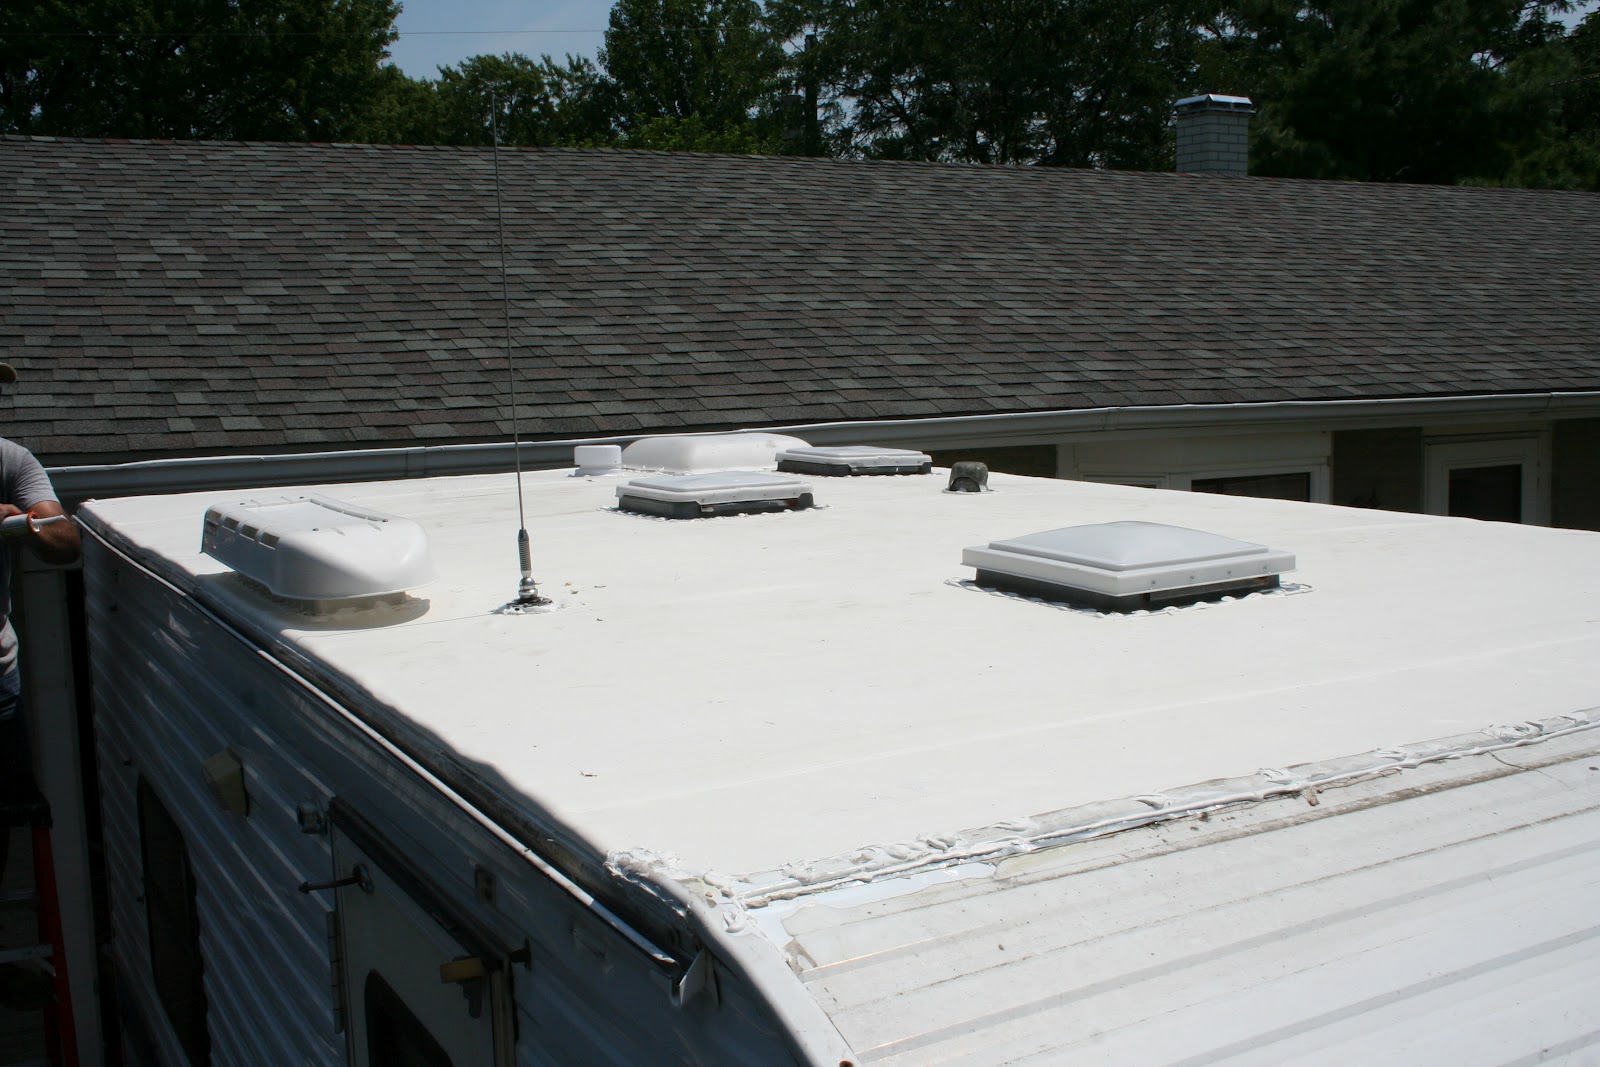
This is what a roof is supposed to look like. White!!!!
We found the rubber roof at Gary Hobart Roofing company in Hobart along with the lap seal we needed. They were awesome there, it was priced great and it was the 6 mil heavier roof that we needed. Thankfully it was only 20 min away! Menard's is where we got the luan, 2x2's and the ceiling piece. Myself, DH and our friend all worked on
it, we pulled it off on Sunday and had it done by Tuesday. We
certainly didn't think that was to bad! So now our camper is nice and sturdy up top!!!


It’s actually a great and helpful piece of information. thanks for it.
ReplyDeleteregards
Roof Repair Towson MD